
A-Max IV Manual to A-Max v 4.0x.


*** Non-final release version ***

This version currently is not fully proof read.
This version currently lacks all images.
JPG Scans now exist at Amiga Hardware Guide sites
and will be added on this site eventually as well...


A-Max IV
The Color Macintosh emulator for your Amiga
User's Guide for
Version 4.0
A-MAX IV ReadySoft, Incorporated
Copyright
The A-Max IV user's guide, and A-Max hardware card are copyright 0 1989-1993 by
ReadySoft Inc., all rights reserved. The A-Max IV software is 0 1993 S.M. Douglas,
Piha Software Inc,, all rights reserved. ReadySoft Inc. grants the purchaser the right to
make a backup copy of the A-Max IV disks for archival purposes only .
Use of Software Licensed to Others
You acknowledge that the use of A-Max IV requires the use of software which is the
property of others, including Apple Computer, Inc. The use of A-Max IV will require
you to procure the right to use such software from Apple Computer, Inc. and/or other
authorized parties. Your failure to lawfully procure the right to use such software may
be a violation of law, including the copyright laws. ReadySoft Inc. makes no represen-
tations concerning the availability or cost of obtaining such rights.
DiscIaimer
Although ReadySoft Inc. believes this program performs the functions described in this
guide, the program is provided as is without performance warranties of any kind, either
expressed or implied, including, but not limited to, the implied warranties of merchant-
ability and fitness for a particular purpose. The entire risk as to the quality and perfor-
mance of this program is with you. ReadySoft Inc. isn't responsible for any damage to
your computer resulting from the installation, use, or misuse, of the A--Max IV system.
ReadySoft Inc. does not guarantee that A-Max IV will run all Macintosh programs, or
run them at full speed.
Limited Warranty
ReadySoft Inc. warrants the magnetic media and hardware from rnanufacturing defects
for a period of 90 days from the date of purchase. Should either fail in the course of
normal use within this 90 day period, ReadySoft Inc. will replace the disk(s) and/or
hardware. It is the responsibility of the purchaser to bear the cost of shipping these
items to Ready-Soft Inc. and to provide proof verifying that the purchase is within the
90 day warranty period.
Items Beyond Warranty
If the disks or hardware fail beyond the warranty period there will be a fee to recopy
disks or replace the hardware. When sending goods to ReadySoft for repair from
outside Canada, please mark the outside of the package "Defective Canadian goods
being returned for repair."
--II--
ReadySoft, Incorporated A-MAX IV
Radio and TeIevision Interference
This equipment has been tested and found to comply with the limits for a Class B
digital device, pursuant to Part 1 5 of the FCC Rules. These limits are designed to
provide reasonable protection against harmful interference in a residential installation.
This equipment generates, uses, and can radiate radio frequency energy and, if not
installed and used in accordance with the instruction manual, may cause harmful inter-
ference to radio communications. However, there is no guarantee that interference will
not occur in a particular installation. If this equipment does cause harmful interference
to radio or television reception, which can be determined by turning the equipment off
and on, the user is encouraged to try to correct the interference by one or more of the
following measures:
. Reorient or relocate the receiving antenna
. Increase the separation between the equipment and the receiver
. Connect the equipment into an outlet on a circuit different from
that to which the receiver is connected
. Consult the dealer or an experienced radio/TV technician for help.
WARNING
Oniy equipment with shieid-grounded cabies (computer input-output devices,
terminais, printers, etc.), certified to compiy with appropriate FCC iimits
can be attached to this device. Operation with non-certified equipment
may resuit in communications interference. Changes or modifications to
this device not expressiy approved by ReadySoft incorporated couid void
the user's authority to operate the device.
Apple, and the Apple logo, AppleTalk, LocalTalk, TokenTalk, EtherTalk, AppleShare,
ImageWriter, LaserWriter, Mac, Macintosh, and MacTerminal are registered trade-
marks and Finder, MultiFinder, Switcher, SuperDrive are trademarks of Apple
Computer, Inc. Amiga iS a registered trademark of Commodore--Amiga, Inc.
PostScript is a registered trademark of Adobe Systems, Inc. Epson is a registered
trademark of Seiko Epson Corporation. SoftPC is a registered trademark of Insignia
Solutions, Inc. A-Max IV is a trademark of ReadySoft, Inc.
Credits
This manual was created using WordPerfect and Ready, Set, Go! by Letraset running
under A-Max IV and System 7 on Commodore Amiga computers.
A-Max IV Software and Design by Simon Douglas
A--Max Hardware Design by Ralph and Gunther Doewich, CyberCube Research Ltd.
A-Max IV User's Guide by Bob Eller, with Jim Meyer
Layout and Graphics by Jim Meyer
Portions of this User Guide are based on the A-Max II Version 2.5 User's Guide by
Gary Gehrnan and Simon Douglas.
Only AMIGA makes it possible!
--III--
Table of Contents
Section 1 - Introduction
About this Manual ............................................................. 1
The A-Max IV System ........................................................... 3
What' s Included . ............................................................ 3
What's Not Included ........................................................... 4
Desirable Extras .............................................................. 4
How to Contact ReadySoft ...................................................... 5
Section 2 - Installing A-Max IV
Backing up your Disks ......................................................... 6
About the Mac ROMs ............................................................ 6
WARNING: Static Discharge ..................................................... 6
Preparing the A-Max IV Card ................................................... 7
WARNING : Electrical Hazard ................................................... 7
Installing ROMs in the A-Max Card ............................................. 7
Installing the A-Max IV Hardware Card ......................................... 8
Upgrading an A-Max II Plus Card for A-Max IV .................................. 9
Installing the A-Max IV Software .............................................. 10
Section 3 - Disk Drives and File Transfer
Amiga Disk Drives ............................................................. 12
A-Max Disk Transfer ........................................................... 12
Copy Mode ..................................................................... 13
Error Mode .................................................................... 13
Transferring Files ............................................................ 14
Section 4 - Starting and Configuring A-Max IV
A-Max IV Startup .............................................................. 15
A-Max IV Preferences .......................................................... 15
Video Preferences ............................................................. 16
Selecting a Controller ........................................................ 16
Configuration ................................................................. 17
24-bit Video .................................................................. 17
Amiga Video ................................................................... 17
Virtual Monitors .............................................................. 19
Color Depth ................................................................... 21
Memory ........................................................................ 21
System Partition Size ......................................................... 21
INIT Partition Size ........................................................... 22
Use External Memory ........................................................... 22
-IV-
ReadySoft, Incorporated A-MAX IV
Multitasking .................................................................. 22
Wait in Foreground ............................................................ 23
Wait in Background ............................................................ 23
Task Priority ................................................................. 23
Devices ....................................................................... 24
Selected Device ............................................................... 24
Mount ......................................................................... 24
Boot .......................................................................... 24
Remove ........................................................................ 25
Format ........................................................................ 25
Add Partition ................................................................. 25
Search SCSI Device ............................................................ 26
Device Driver ................................................................. 26
Device Number ................................................................. 26
Device Flags .................................................................. 26
Add Existing File ............................................................. 27
Create New File ............................................................... 27
SCSI .......................................................................... 28
ID# .......................................................................... 29
Device Driver ................................................................. 29
Mem Type ...................................................................... 29
Any ........................................................................... 29
24 Bit ........................................................................ 29
Chip .......................................................................... 29
General ....................................................................... 30
Format 720K Floppies .......................................................... 30
Right Button Mode ............................................................. 30
Serial/Parallel ............................................................... 30
Port Mode ..................................................................... 31
Plus Card ..................................................................... 31
Enable MIDI ................................................................... 31
Device ........................................................................ 32
File .......................................................................... 32
Networking .................................................................... 33
Save .......................................................................... 33
Start A-Max IV ................................................................ 33
Quit .......................................................................... 33
Section 5 - A-Max IV Operation
Keyboard Differences ...........................................................34
Disk Eject .....................................................................35
-V-
AMAX IV ReadySoft, Incorporated
Finder Shutdown ............................................................... 36
Emergency Shutdown ............................................................ 36
Mouse Control ................................................................. 36
Transferring Text from the Amiga to Mac ....................................... 37
Transferring Text from the Mac to Amiga ....................................... 37
Formatting Disks .............................................................. 37
Sound . . . . . . . . . . . . . . . . . . . . . . . . . . . . . ............... 38
Real Time Clock ............................................................... 38
Macintosh System Information .................................................. 38
Yearning to Use the Macintosh ................................................. 39
Section 6 - Hard Drives and File Devices
Partitioning an AmigaDOS Hard Drive ........................................... 40
Making A-Max IV Partitions Bootable ........................................... 42
A-Max IV Partitions Under AmigaDOS ............................................ 42
Using Mac SCSI Devices
without A-Max IV Partitions ................................................... 43
Startup Sequence . . . . . . . . . . .. . ..................................... 43
Section 7 - Software Compatibility 44
System Disks .................................................................. 44
Compatibility with Macintosh Applications .....................................
What to Do if an Application Won't Run ........................................ 45
Section 8 -Moving Files Between the Amiga and Macintosh 47
File Conversion Options ....................................................... 47
Advanced Options .............................................................. 48
Fork Selection ................................................................ 48
File Type and File Creator .................................................... 48
Transferring Files and Directories ............................................ 48
From AmigaDOS ................................................................. 48
To AmigaDOS ................................................................... 49
Section 9 - Printers
Drivers For Other Printers .................................................... 50
ImageWriter Emulation ......................................................... 50
Creating A PostScript File .................................................... 50
Section 10 - A-Max IV Hardware Features
LocalTalk (AppleTalk) ......................................................... 52
MIDI (Musical Instrument Digital Interface) Support............................ 51
Glossary ......................................................................
-VI-
Section 1
Introduction
Thank you for purchasing A-Max IV, a hardware and software system that
allows you to use Macintosh software, in color, on any Amiga model
equipped with a 68020, 68030, or 68040 processor and an expansion slot for
the addition of the A-Max hardware card.
A-Max IV makes use of all of your Amiga's resources, including RAM, hard
and floppy drives, serial and parallel POrtS, mouse and keyboard, during
Macintosh emulation. Since A-Max IV runs original, unaltered Macintosh
applications directly on your Amiga, you will find that most software runs as
fast or faster on your Amiga as on a similarly equipped Macintosh. An Amiga
4000 with a 68040 processor, for example, will give you performance compar-
able to that of a similarly equipped Macintosh, such as the Quadra 950.
Adding A-Max IV to your Amiga provides access to most of the productivity
software available to Macintosh users, while retaining the unique capabilities
available using the Amiga.
Even better, A-Max IV requires you to use the less expensive 128K Mac Plus
ROMs, and includes extensions to these ROMs to support faster processors,
memory management units, floating point math coprocessors, and large RAM
sizes. A-Max IV also provides easy access to enhanced color modes using
either an Amiga video card or an AGA equipped Amiga, such as the Amiga
4000, large screen monitors, and smooth panning virtual screens larger than
your monitor's physical display.
Unlike previous versions of A-Max, A-Max IV does not shut down the
normal AmigaDOS operating system. Therefore, it is now possible to multi-
task Amiga programs with A-Max IV.
About this Manual
This manual is desired to help you quickly begin using the A-Max IV
system and to describe the differences between an Amiga with A-Max IV and
a Macintosh.
While we discuss the installation and operation of A-Max IV , we assume you
are familiar with the Macintosh system and the Mac applications you wish to
use. We also assume you are familiar with the operation of your Amiga. lf
you need assistance with the basic operation of the Amiga, consult the user
----1----
AMAX IV ReadySoft, Incorporated
manual that accompanied your system. lnformation on using the Macintosh
operating system is included with the System 7 upgrade kit, available from
Apple.
ln order for the installation and set-up of A-Max IV to go smoothly, please
review this manual before attempting to install or use A-Max IV . The manual
has been constructed according to the following general outline:
Introduction: The section you are now reading.
Installing A-Max IV : Describes setting up the hardware elements of A-Max
lV and connecting it to your Amiga.
Amiga Disk Drives and File Transfer: Explains the types of Amiga disk
drives compatible with A-Max IV and how to use the AmigaDOS based A-
Max lV File Transfer utility to copy low-density Macintosh disks for use with
A-Max IV.
A-Max IV Startup: Describes how to get A-Max IV up and running and the
various display and configuration options available.
A-Max IV Operation: Discusses the differences between using a true Macin-
tosh and an Amiga functioning as one under A-Max IV .
Using A-Max IV with Hard Drives: Describes how to set up Amiga hard
drive partitions for use as A-Max/Macintosh storage devices. Also, how to
access external SCSl devices through the Amiga controller.
Software Compatibility. Presents information relating to different versions of
the Macintosh system software and describes the sorts of third-party programs
that will not work under A-Max IV .
Macintosh File Transfer Utility: Explains how to move files from your A-
Max lV Mac to the Amiga.
Printers: Explains how to use your printer with A-Max IV .
Glossary: Contains an alphabetized list of terms used in this manual.
Index: An index to the information contained in this manual.
-2-
ReadySoft, Incorporated AMAX IV
The A-Max IV System
The A-Max IV system consists of the A-Max IV software and an internal
expansion card for any Amiga using a 68020, 68030, or 68040 processor. The
card has two sockets for ROM chips and connects inside your Amiga to the
floppy disk drive chain, enabling you to read/write Mac format disks using
standard Amiga drives - no Apple drive is required.
The A-Max hardware also provides two serial ports that are pin compatible
with those found on a real Macintosh. The serial ports can be configured as
RS422 serial, LocalTalk, or MlDl. The MlDl option allows direct connection
to MlDl standard digital musical instruments, without the need for an external
midi interface box.
What's Included
lf you purchased the complete A-Max IV system, your package should
contain:
. The A-Max hardware expansion card
. One disk labeled "A-Max IV Program"
. This manual
. An A-Max IV registration card
lf you purchased the A-Max 11 Plus to A-Max IV upgrade, your package
should contain:
. A replacement chip for your A-Max 11 Plus hardware
. One disk labeled "A-Max IV Program"
. This manual
. An A-Max IV registration card
Note: lt is very important that you complete and mail the registration card
back to us as soon as possible. ln addition to confirming your 90 day warran-
ty, this card is the only way we can inform you of product upgrades and other
information regarding A-Max IV . Please complete and send in your card now.
The A-Max Program disk contains a file called ReadMe. This file includes
information that was unavailable at the time this manual was printed. Please
consult this file for any updates and corrections to this manual.
-3-
AMAX IV ReadySoft, Incorporated
What's Not Included
ln order to use A-Max IV, you must supply:
. AmigaDos 2. 1 or higher
. A 68020 or higher Amiga with Zorro expansion slots. No floating point
math coprocessor (FPU) or Memory Management Unit (MMU) is required
to use A-Max IV .
. At least four (4) megabytes of Fast Amiga memory with a minimum of two
(2) megabytes available when starting A-Max IV .
. An Amiga hard drive
. Apple 1 28K boot ROMs. These come as a set of two 28 pin chips from an
original Mac 512K E or a Mac Plus.
. Macintosh System disks Version 7.0 or higher. Macintosh System 7.1 is
recommended. Consult Section 3 for information on Apple system
software. You MUST use Macintosh System 7 in order to obtain color Mac
emulation !
. Mac applications and data.
Desirable Extras
. An Amiga high density (HD) drive for direct compatibility with Macintosh
HD disks.
. An A-Max MIDI connector cable, available from ReadySoft, if you would
like to make use of the A-Max hardware's MIDI features. The cable
connects to one of the card's mini DIN-8 sockets and provides standard
MlDl DIN-5 IN and OUT sockets.
. A 24-bit Amiga graphics card, such as the Retina or Picasso, to allow 8, 16
and 24-bit Macintosh graphics emulation without the Advanced Graphics
Architecture (AGA) chipset found on the Amiga 4000.
-4-
ReadySoft, Incorporated AMAX IV
How tO Contact ReadySoft
lf you require warranty assistance, would like to purchase an A-Max Midi
cable, have a question, or just want to rave about how great A-Max IV is,
please call us at (416) 731-4175, between 9 a.m. and 5 p.m., eastern time,
Monday through Friday . You may also FAX us at (416) 764-8867 .
-5-
Section 2
Installing A-Max IV
Backing up your Disks
Protect your investment. Before you begin, make a backup copy of the A-Max
Program Disk. This disk is not copy-protected and can be copied by using the
Amiga Workbench Duplicate menu command, the CLI Diskcopy command, or
any Amiga disk backup utility.
ReadySoft supplies A-Max IV without copy protection for your convenience.
Please don't lend, give or otherwise distribute this program to anyone. Remem-
ber, software piracy discourages development of new products and, in particu-
lar, upgrades to A-Max IV .
About the Mac ROMs
Y ou will need to purchase a set of Macintosh 1 28K ROMs in order to use A-
Max lV . A "set" of ROMs are two matched chips from an older Macintosh
computer. There have been several revisions to both of the Macintosh 128K
ROMs. All ROM revisions will work equally well with A-Max IV . The
Macintosh ROMs are Apple part numbers 342-0341-x and 342-0342-x where 'x'
is a revision letter A,B,C. Often the set of two chips will have different revision
letters. Always keep the two ROMs as a set. The revision letters on each chip
do not need to match.
WARNING: Static Discharge
lf you are removing the ROMs from a Macintosh, be extremely careful not to
come into contact with the wires connecting the video display tube to the video
board. Like your television, the video display tube may contain a deadly high-
voltage charge, even if the computer is unplugged.
Apple ROM chips, like all electronic devices, are extremely sensitive to static
electrical discharge. lmproper handling of the chips could damage them. Be
sure to ground yourself by touching a metal surface or using a static protection
wrist strap (available from Radio Shack) before handling the ROM chips.
-6-
Section 2
Installing A-Max IV
Backing up your Disks
Protect your investment. Before you begin, make a backup copy of the A-Max
Program Disk. This disk is not copy-protected and can be copied by using the
Amiga Workbench Duplicate menu command, the CLI Diskcopy command, or
any Amiga disk backup utility.
ReadySoft supplies A-Max IV without copy protection for your convenience.
Please don't lend, give or otherwise distribute this program to anyone. Remem-
ber, software piracy discourages development of new products and, in particu-
lar, upgrades to A-Max IV .
About the Mac ROMs
Y ou will need to purchase a set of Macintosh 1 28K ROMs in order to use A-
Max lV . A "set" of ROMs are two matched chips from an older Macintosh
computer. There have been several revisions to both of the Macintosh 128K
ROMs. All ROM revisions will work equally well with A-Max IV . The
Macintosh ROMs are Apple part numbers 342-0341-x and 342-0342-x where 'x'
is a revision letter A,B,C. Often the set of two chips will have different revision
letters. Always keep the two ROMs as a set. The revision letters on each chip
do not need to match.
WARNING: Static Discharge
lf you are removing the ROMs from a Macintosh, be extremely careful not to
come into contact with the wires connecting the video display tube to the video
board. Like your television, the video display tube may contain a deadly high-
voltage charge, even if the computer is unplugged.
Apple ROM chips, like all electronic devices, are extremely sensitive to static
electrical discharge. lmproper handling of the chips could damage them. Be
sure to ground yourself by touching a metal surface or using a static protection
wrist strap (available from Radio Shack) before handling the ROM chips.
-7-
AMAX IV ReadySoft, Incorporated
Ensure that the two rows of pins on each chip are not crooked or broken. To
insert the chip, start with one row of pins resting lightly in their sockets, then
align the second row. Finally , push the whole chip firmly into place. lf the
chip is very hard to push in all the way, check that no pins are bent up under-
neath the chip. lf there are, straighten them out and try again.
When both the ROM chips have been installed, hold the board so that the "A-
Max @ ReadySoft" text is in the upper right-hand comer of the board, and
reads properly. Check that the notches of the ROM chips point up and that no
pins are bent or broken. You are now ready to install the card in your Amiga.
Installing the A-Max IV Hardware Card
Remove your Amiga's cover. For information on removing the Amiga's cover
and installing peripheral cards, please consult your Amiga's manual.
The A-Max card will install in any free 100-pin Zorro slot in your Amiga. To
allow an easy connection between the A-Max card and the Amiga's floppy
drive connector, however, we recommend that you use the slot closest to the
power supply and floppy drives in the A2000, and the top-most slot in the
A3000 or A4000.
Decide on the slot you wish to use and carefully insert the A-Max card into
this slot.
-8-
ReadySoft, Incorporated AMAX IV
ln order to read Mac formatted disks with your Amiga drive, you must
connect the A-Max card's 34-pin floppy connector into the drive chain.
Disconnect the 34-pin ribbon cable that presently connects the Amiga mother-
board to the internal floppy drives and replace it with the cable that came with
A-Max IV . This replacement 34-pin cable has female connectors for the
Amiga motherboard and the A-Max hardware card. Plug the cable into the
Amiga's motherboard connector and the A-Max hardware card connector
labeled To Amiga Motherboard.
Use the cable that was previously connected between the Amiga's mother-
board and the disk drive to connect the drive to the upper 34-pin connector on
the A-Max hardware, labeled To Amiga Floppy. Make sure the end of the
cable with a twist is connected to drive DF0:.
IMPORTANT! Each cable has a red stripe on one edge. Adjacent to each
of the 34-pin connectors on both the Amiga motherboard and A-Max card
is a numeral 1 , denoting Pin 1 of the connector. When connecting your
cables, make sure the red strip on the cable is on the same side of the
connector as the marking for Pin 1 .
After the A-Max card is installed, if you wish to make use of MlDI software
with A-Max IV, plug the optional MlDl cable into the mini DIN-8 serial
socket labelled "MODEM/MIDI" and move the MIDI control switch to the
position labelled "MlDl. ,, If you will not be using this port for MlDl, make
sure the switch is in the position labelled "STD."
Upgrading an A-Max II Plus Card for A-Max IV
If you are upgrading to A-Max IV from A-Max 11 Plus you will need to
modify your A-Max Il Plus hardware.
NOTE: lf you purchased the A-Max hardware with the A-Max IV software
this modification has already been done for you.
1. Open your Amiga and disconnect the drive cable that connects DF0:, as
well as the cable to the Amiga mother board, from the A-Max Il Plus card.
2. Remove the card from your Amiga and place it on a dry, clean, flat surface.
-9-
AMAX IV ReadySoft, Incorporated
3. Locate the chip labelled IC5 near the center of the A-Max 11 Plus card. The
label IC5 is located just below the chip that must be replaced. With the
edge connector that inserts in the Amiga's slot facing towards you, IC5 is
located just to the right of the Mac 1 28K boot ROMs.
4. Using either a small flat-blade screwdriver or a chip pulling tool, gently
remove the existing IC5 chip from the board.
5. Locate the replacement IC5 chip that was included in your A-Max IV
upgrade kit. Making sure that the notch on the IC5 chip is facing towards
the top of the A-Max card, in the same direction as the notches on the
adjacent lCs, carefully line up the legs of the IC5 chip with the holes in the
IC5 socket on the board. A small amount of pressure may be needed to
align the IC5's legs with the socket. lf so, align one side of the chip's legs
with the socket and gently press until the legs on the other side of the chip
are lined up.
6. When the legs are lined up with the appropriate socket holes, gently press
the new chip into the socket making sure not to bend the legs on the chip. lf
a leg is bent during installation, carefully remove the chip and gently
straighten the bent leg.
Be careful not to break the leg of the chip! ReadySoft will not be responsible
for damage incurred during the installation. lf you are uncomfortable install-
ing this chip, please have the installation performed by a qualified electronic
technician.
7 . Reinstall your A-Max card, reconnect the drive and motherboard cables,
and close your Amiga.
lf you need help reinstalling the A-Max hardware, please consult the installa-
tion section above.
Installing the A-Max IV Software
The AmigaDOS format A-Max Startup program and associated utilities must
be installed on your hard drive.
The A-Max IV disk is not copy-protected and includes an automatic hard disk
installation program called A-Max lnstall. Simply click on the A-Max lnstall
icon and you will be prompted to supply the drive and directory names as
destinations to receive the necessary A-Max IV files.
-10-
ReadySoft, Incorporated AMAX IV
Even though you could manually install the A-Max IV software, we recom-
mend that you use the installer to insure the files are properly placed on your
Amiga.
The installer will copy the following files and create these directories:
File Directorv
A-Max Startup User-specified destination
A-Max Disk Transfer User-specified destination
A-Max Utilities DEVS:A-MaxFileDevices
Video Controller Files DEVS:A-MaxVCtrls
A new command, A-MaxInit, will be copied to your Amiga's C: directory. A
line will be added to your startup-sequence, as the first command following
the SETPATCH command, to automatically run A-MaxInit each time your
Amiga is booted. A-Maxlnit restarts the Amiga each time the machine is
powered-up.
Important: A-Max IV will not operate unless A-Maxlnit is installed and
functioning properly .
Please restart your Amiga following the software installation. This makes sure
that A-MaxInit is functioning when you first use A-Max IV.
-11-
Section 3
Disk DriVes and File TranSfer
Amiga Disk Drives
A-Max IV can directly read only Macintosh high-density disks under Mac
emulation. In order to do this, however, you must have an Amiga high-
density (1.76 Mb) disk drive. We highly recommend that you add a high-
density disk drive to your system since all Apple system software is normally
provided on a high-density disk. You will need to special order Apple system
software on low-density disks from either Apple or your local dealer if your
Amiga has a low-density drive.
If you have an Amiga low-density (880K) drive, you will be able to read and
format IBM PC format 720K disks under Mac emulation. Since most of
today's Macs contain the Apple SuperDrive, you will be able to share data
with a real Mac using an IBM PC format low-density disk.
ln order to read to a Mac low-density disk with an Amiga disk drive (either
low or high-density) you must use the supplied A-Max IV Disk Transfer
program to copy the Mac disk into a file device compatible with A-Max.
A-Max Disk Transfer
The A-Max Disk Transfer program provides the means to transfer the contents
of Mac low-density disks to a file, as well as transfer Mac files to low-density
disks. Low density disks are read in their entirety, and the contents are stored
in an A-Max-readable file. This program works best with low-density drives;
if one is available, you should use it, although high density drives should not
cause problems under most circumstances.
To use the A-MaxDisk Transfer program, double-click on the icon. The A-
Max IV Disk Transfer window, shown on the next page, will display.
-12-
ReadySoft, Incorporated AMAX IV
You must first indicate which floppy drive you'll be using. Click on the
appropriate button.
Copy Mode
After you select the floppy drive, select a copy mode:
Only Allocated Blocks - This mode only copies those blocks which have
been allocated; that is, blocks which have been written to and are currently
marked as active and not deleted. This is the fastest mode, as only real infor-
mation, and not empty blocks, is copied. Under most circumstances, this
mode should be used.
Full Disk - The entire contents of the disk are transferred. Full Disk mode is
useful if you are copying a non-standard or damaged disk.
Verify Writes - All writes will be compared against the original information,
to test for errors. Note that turning Verify Writes on will add appreciably to
the amount of time a transfer takes.
Error Mode
A-Max Disk Transfer offers two different methods of error handling. Each
mode is exclusive; selecting one automatically de-selects the other. The
modes are:
Abort on Disk Error - lf a disk error is encountered, the transfer will be
aborted.
Skip Errors - lf an error is encountered, the entire disk will be copied
anyway . Note that the resulting file or disk may not be usable.
-13-
AMAX IV ReadySoft, Incorporated
Transferring Files
lf you are transferring a disk to a file, you can use the Set Directory gadget to
specify the directory to which the file will be sent. The default directory is
DEVS :A-MaxFileDevices. Files that are written to this directory are
automatically recognized by A-Max IV at boot. lf the file is written to another
location, it will have to be mounted before it can be recognized. (Use the
Devices gadget on the A-Max Startup window.)
Once all the specifications have been made, initiate the transfer by clicking on
the appropriate button. "Transfer File to Disk" will copy a Mac disk image
file to a DS/DD low-density floppy, in Mac format. "Transfer Disk to File"
copies a low-density Mac disk to a disk image file.
The Disk Name field contains the name of the Mac disk. lf you are copying a
disk to a file, this name is taken from the disk. The resulting file is given the
same name. If you are copying a file to a disk, this name is taken from the
file; the resulting disk is given the same name.
The Deltas field gives you an indication of how well the disk read operation is
performing; the lower this number is, the more closely the disk is being
tracked. The Errors field will keep track of the number of errors encountered.
The Track field reports the track currently being read or written, depending on
the operation .
Close the Disk Transfer program either by clicking on the Quit gadget, or by
clicking on the Close gadget.
-14-
Section 4
Starting and Configuring A-Max IV
This section is designed to get you quickly up and running your A-Max IV
based Macintosh. For information on installing the A-Max IV software and
hardware, consult Section 2, lnstalling A-Max IV .
A-Max IV Startup
Locate the A-MaxStartup program on your hard drive. A-MaxStartup will be
located in the hard drive directory you specified for the installation of your A-
Max IV files.
For easy use, you may wish to use the Workbench "Leave Out" feature to
leave the A-MaxStartup icon on your Workbench. To leave the icon on the
Workbench, drag the A-MaxStartup icon out of its normal directory and place
it on the Workbench window. With the A-MaxStartup icon still highlighted,
select LEAVE OUT from the Workbench lCON menu.
To begin using A-Max IV, double-click the A-MaxStartup icon using the left
mouse button .
Running the A-Max Startup program from the CLI, rather than Workbench,
allows you to add the option "auto" to the command to begin Macintosh
emulation without any user action, for example:
run A-MaxStartup auto
If you don't select the autorun option, or start the program from Workbench,
A-Max IV will present its preferences screen before beginning the emulation.
A-Max IV Preferences
Running the A-MaxStartup program opens the A-Max IV Preferences menu
and displays the A-Max IV copyright box. To remove the copyright box from
the screen, select it by clicking the box with the left mouse button, or select
one of the A-Max IV Preference buttons.
-15-
AMAX IV ReadySoft, Incorporated
The A-Max IV Preferences menu is divided into eight categories: Video,
Memory , Multitasking, Devices, SCSl, General, and Serial/Parallel. Each is
used to configure how A-Max IV interacts with your Amiga during emulation.
lf you are running A-Max IV for the first time, or your A-Max IV configura-
tion file has been deleted, the Video preferences will be automatically
displayed.
Video Preferences
The manner in which the Mac desktop is displayed is controlled through the
Video Preferences window. Click on the Video gadget in A-Max IV Preferences
to display this window.
Selecting a Controller
When the Video Preferences window opens, a list of the available Controllers
will display in a scrollable dialog. You will always see at least one controller:
Amiga Built-in Video. If you have a display card, such as a Picasso or Retina
board, and have installed the proper A-Max driver in the Devs : A-
MaxVCtrls directory, this card will also show up in the Controllers list.
All of the controllers displayed in the Controllers list are available within the
Macintosh emulation, and can be further configured through the Monitors
control panel.
-16-
ReadySoft, Incorporated AMAX IV
Configuration
24-bit Video
lf you are using a 24-bit graphics board, all configuration of that board is done
through the software that came with the board.
Other than selecting the appropriate board and the resolution you wish to use,
no further configuration within A-Max IV is necessary.
Several styles of 24-bit graphics cards are currently available for the Amiga.
Some may require that you use two monitors (or one monitor with a switch-
box to change between Amiga graphics and the graphic card), while others
allow you to display both Amiga graphics and 24-bit graphics using one
monitor.
A-Max IV should be compatible with a Workbench running through an
emulation mode of the 24-bit graphics card. Make sure, however , that A-
Max's screens are NOT redirected through the emulation software. A-Max,
via its video driver, will send the proper video output directly to the hardware.
For a list of currently supported 24-bit graphics boards, please see the
README file included on the A-Max IV program disk.
Amiga Video
A-Max IV can make use of any of the Screen Modes available for Amiga
video. ln fact, you can configure A-Max to use a number of different Screen-
Modes; each will appear to the Macintosh emulation as a "virtual monitor. ,,
Configuration is done as follows:
From the Video Preferences window , highlight "Amiga Built-in Video" and
click on the Configure button. A requestor, similar to the Amiga's Screen-
Mode requestor, will display.
-17-
AMAX IV ReadySoft, incorporated
Each ScreenMode is added and configured individually. You may choose as
many as eight different lntuition screens. Bear in mind that the memory
required for each screen is allocated out of both "chip" and "fast" Amiga
memory . The more screens you add, the more memory is used.
The steps are the same for each Amiga Screen Mode you configure:
1 - Select the screen mode from the scrolling screen mode list.
2 - Select an Overscan mode by clicking on the Overscan gadget. Each click
cycles to the next option, one of the following:
Text Size
Graphics Size
Extreme Size
Maximum Size
These modes are taken from the Amiga settings, as defined in Overscan Prefs.
The Width and Height settings for each mode is displayed in the Width: and
Height: text gadgets. You can directly edit the values in these gadgets, provid-
ed the values you enter are "legal" for the selected screen mode.
3 - The AutoScroll flag enables and disables AutoScrolling. Click on the
gadget to toggle it between modes. When AutoScroll is enabled, a check
appears within the gadget.
4 - When the settings are satisfactory, click on the AddScreen gadget.
5 - Click on Done to store, temporarily, the Video Preferences settings. Note
that you must click on Save, from the A-Max IV Preferences window, to
permanently save these settings.
-18-
ReadySoft, incorporated AMAX IV
Once you select the Configure option, you must add at least one screen. lf you
don't, a warning requestor will display .
The number of the screen you are configuring is displayed in the title bar of
the configuration window. For example, the titlebar will read "Screen #1 -
Amiga System Video" for the first screen, and the number will increment for
each additional screen. Once the screens have been configured, the number of
configured screens for the selected controller is displayed at the top right-hand
side of the Video Preferences window .
When you have finished configuring your screens, click on OK. This will
return you to the A-Max IV Preferences window. Click on Save to perma-
nently store your settings. lf you do not save your settings, they will be valid
only for the current A-Max session.
Virtual Monitors
The Macintosh employs a system of "virtual monitors." Each monitor serves
as an additional Desktop area, and objects (program icons, folders, and files)
can be dragged from one monitor to another.
The A-Max IV Mac emulation utilizes virtual monitors in two different ways.
lf, for example, you have a 24-bit display card, you can have two different
physical monitors. Under these conditions, the A-Max version of virtual
monitors behaves the same way that the Macintosh version does. When
properly set up through the Monitors control panel, each physical monitor will
display its own area of the desktop. You can then drag objects from one
monitor to another.
When you are using the Amiga system video, however, the virtual monitors
are truly virtual. You could, for example, have two screen modes defined:
DBLNTSC:High Res No Flicker, and MULTlSCAN:Productivity. These two
modes would then appear to the Mac desktop as two different virtual monitors.
However, both "virtual" monitors actually share the same physical monitor.
You can still drag objects from one monitor to another. Crossing the
boundary of one monitor brings to the front the screen for another monitor
you've defined. ln the example above, the screens would shift from
DBLNTSC:High Res No Flicker to MULTlSCAN :Productivity, as you moved
from one desktop to the other.
-19-
AMAX IV ReadySoft, incorporated
When using an Amiga-based lntuition screen under Mac emulation, you retain
all of the abilities of a standard Amiga screen. You can scroll the screen using
the right Amiga-left mouse button combination, or you can drag the screen
down by selecting the top of the Mac screen, in the area usually reserved for
the Amiga menu bar, and pulling down while holding the left mouse button.
The configuration of virtual monitors is done within the Mac emulation,
through the Monitors control panel. A-Max will boot into the last screen
mode configured. When you first configure two or more Amiga System
monitors, only the last one configured will be available. To activate the
others, you must open the Monitors control panel. This causes all secondary
screen modes to be recognized as virtual monitors.
These virtual monitors can be configured to occupy different areas of a larger
virtual desktop. The transition boundary between one virtual monitor and
another is defined by the adjoining sides. ln the configuration shown below,
monitors 1 and 2 are horizontally adjacent, while monitors 1 and 3 are verti-
cally adjacent. Moving the mouse pointer across the right side of monitor 2
would bring you into the desktop of monitor 1 ; moving through the top side of
monitor 1 would bring you into the desktop of monitor 3.
-20-
ReadySoft, incorporated AMAX IV
Note that the menu strip, following Macintosh convention, can be moved to
any configured monitor. Under some circumstances, such as moving the Mac
mouse to a second display during startup, this arrangement can cause you to
boot into an "empty ,, monitor when you run the A-Max emulation. lf this
happens, simply move the mouse to the desktop that contains the menu strip.
Color Depth
Color Depth - the number of colors available - for each screen is also set
through the Monitors control panel. Note that you are limited to the number
of colors available for the video system you are using. On ECS Amigas, the
maximum is 1 6 colors. AGA Amigas allow for 256 colors. Third-party
boards allow for up to 24-bit color ("millions of colors," in Macintosh
parlance). Color depth is set individually for each monitor.
When changing the color depth of any screen, the Mac Finder should be the
only application running. Some Macintosh applications may be incompatible
with A-Max's method of changing screen modes on the fly . Furthermore, if a
screenmode change should be unsuccessful, and the screen which failed is the
main screen, the Mac emulation must be shut down. Any unsaved work
would be lost. lf the screen which fails is not the main screen, you have the
option of continuing without the screen.
Memory
Selecting the A-Max IV Preferences Memory button opens the Memory
Preferences menu. Memory Preferences sets up how A-Max IV uses your
Amiga's memory.
System Partition Size
System Partition Size sets aside the amount of memory permanently allocated
for use by the Macintosh. Any memory that is set aside but not used by the
Macintosh system will be available for use by Mac applications before any
other Amiga memory is used.
-21-
AMAX IV ReadySoft, incorporated
The minimum System Partition Size is 1 200K, the default setting, and may be
increased by entering the amount of memory you wish in the System Partition
Size requester. Selecting Kb allows you to enter the information in kilobytes,
Mb allows you to specify the information in megabytes of memory . The
default value 1200K, would be 1.2 if Mb is selected.
Selecting Best Fit from Memory Preferences allocates the System Partition so
that the remaining free memory is as large as possible. This usually means,
however, that the system partition memory will be allocated to the slower
Amiga chip memory which reduces performance.
INIT Partition Size
INIT Partition Size sets the amount of memory allocated for use by Macintosh
INITS as the system boots. A default value of 900K is available. The amount
of memory available may be increased by entering a value in the INIT Parti-
tion Size requester. Any unused memory will also be available to Macintosh
applications.
Use External Memory
lf the Use External Memory button is selected, tthis is the default) A-Max IV
will allocate Amiga memory for Macintosh applications as they are run.
Exiting the application frees the memory used for use by the Amiga, or anoth-
er Mac application.
lf Use External Memory is not selected, the System Partition Size must be
large enough to accommodate the Macintosh applications you plan to use. The
only reason to disable the Use External Memory function would be to run an
application that is incompatible with externally allocated Amiga memory. At
the present time, ReadySoft is unaware of any applications that have this
limitation.
After your Memory Preferences are complete, select the OK button to return to
the main Preferences menu.
Multitasking
Selecting the Multitasking button from the A-Max IV Preferences menu opens
the Multitasking Preferences menu. The Multitasking Preferences are used to
establish how the Amiga and Macintosh share system resources, such as the
CPU , during emulation.
-22-
ReadySoft, incorporated AMAX IV
Wait in Foreground
lf Wait in Foreground is selected, A-Max will allow the Amiga to use the
processor as much as possible when A-Max is the current Amiga application
and the Macintosh system is idle and waiting for input.
Wait in Foreground should be disabled ONLY when using applications that
are timing dependent, such as games like Microsoft Flight Simulator.
The number of seconds A-Max will let the Mac system idle before giving up
the CPU to AmigaDOS can be manually set by entering a value in the adjacent
field. This value is set in sixtieths of a second (seconds/60). The default value
is 10 sixtieths of a second. This value may need to be increased on slower
Amigas, if A-Max fails to release the CPU when it is the foreground applica-
tion.
Wait in Background
lf Wait in Background is selected, A-Max IV will free the processor as much
as possible when it is in the background and the Macintosh system is idle.
Task Priority
Task Priority sets the priority of A-Max with respect to other Amiga applica-
tions. A priority of 0, the default value, will generally be adequate. lf you
wish to give A-Max a higher priority you may raise the task priority by enter-
ing a new value in the Task Priority requester. The priority, however, should
never exceed 15.
When the Multitasking Preferences have been set, select OK to return to the
A-Max IV Preferences Menu.
-23-
AMAX IV ReadySoft, incorporated
Devices
Selecting Devices from the A-Max IV Preferences menu opens the Device
Preferences menu. The Device Preferences menu is used to set up all filing
devices (disk drives, hard drive partitions, or file devices) used by A-Max IV .
A-Max IV devices may be any of the following:
Floppy - An Amiga disk drive
A-Max Partitions - A partition on an Amiga hard drive designated for A-
Max use. See Section 6 for information on setting up an A-Max partition on
your hard drive.
Mac SCSI Partition - A dedicated hard drive attached to the Amiga's SCSl
controller but dedicated to A-Max use.
File Devices - Files created by A-Max IV, either using the File Transfer Utili-
ty or created directly from the Device Preferences menu. File Devices are
files contained on the Amiga's hard drive. Most file devices are stored in the
DEVS :A-MaxFileDevices directory.
The Device Preferences menu lists the devices currently available for use in
the area on the left, labeled "Devices. ,, Selecting a device from the list
provides information on its current settings, as well as the type of device.
Selected Device
The Selected Device area of the Device Preferences Menu lists the device type
of the currently selected device.
Mount
Selecting Mount allows the currently selected device to be mounted when you
begin Macintosh emulation. A mounted device is available for use on the
Macintosh desktop.
Boot
Selecting Boot allows the currently selected device to be used to contain the
system files needed to start the Mac. Any device may be a boot device. The
-24-
ReadySoft, incorporated AMAX IV
Mac will boot from the selected device, unless a Mac disk with the proper
system files is available in the floppy drive. lf so, the Mac will boot from the
floppy.
Note: The Mac's "Startup Disk" control panel has no effect on the disk used to
start Mac emulation under A-Max IV . All Boot settings must be made from
the A-Max IV Device Preferences menu.
Remove
Removes the currently selected device from those available to A-Max IV .
Remove is especially useful for deleting files created by the A-Max IV Disk
Transfer utility after the file's contents have been transferred to the Mac hard
drive or partition.
If you elect to remove a file device you will be prompted before the file is
deleted. If you do not wish to remove the file, selecting cancel returns you to
the Device Preferences menu.
Format
Format will format the currently selected device in Macintosh format. Format
may be used to format partitions, mounted drives, or files for use by A-Max
IV . If Format is ghosted, such as when an Amiga floppy is the selected
device, the device can usually be formatted from the Mac desktop.
Add Partition
Adds a partition to the list of available devices. There is no restriction to the
number of partitions or SCSl controllers you may access when using A-Max
IV.
IMPORTANT: Do not add devices which have AmigaDOS information you
wish to retain. Adding the device, and formatting it under A-Max, deletes any
AmigaDOS information contained on the device.
-25-
AMAX IV ReadySoft, incorporated
Selecting Add Partition displays a requester listing the AmigaDOS partitions
that are not currently used by A-Max IV . Select the partition you wish to add
from the list of available partitions. Select the Add Partition button to add it to
the list of available A-Max devices. Select Done to complete your choices and
return to the Device Preferences menu.
Selecting Done, without adding a partition, will return you to the Device
Preferences menu without changing the status of the devices listed.
Search SCSI Device
Search SCSI Device is used to mount a Mac formatted device attached to the
Amiga's SCSl controller. Selecting Search SCSI Device from the A-Max IV
preferences menu opens the Search SCSl Device menu.
The right area of the Search SCSI Device menu is used to enter information on
the SCSl device you are searching for and the SCSl controller to which it is
attached .
Device Driver
Device driver is the name of the SCSl device driver used by the Amiga. For
most Commodore SCSl controllers, the device driver is named scsi.device. lf
you are not using a Commodore controller, consult the controller's manual for
the name of the SCSl device it uses.
Device Number
Enter the device number, sometimes known as SCSl lD, of the device you are
searching for. Most external SCSl devices have easily accessible ways to
change the number on the device. lt is important that no two devices attached
to a SCSl controller have the same device number.!
Device Flags
Device Flags are device driver-dependent. Please check the user manual for
the device to determine if a Device Flag is needed. ln most cases, the Device
Flag may be left at 0, its default value.
-26-
ReadySoft, incorporated AMAX IV
Any partitions found will be listed on the left of the Search SCSl Device menu
under Added Partitions. Selecting Create Mountlist Entries, located on the
bottom of the Search SCSl Device menu, creates an AmigaDOS 2.0 compati-
ble mount file in the DEVS:DOSDrivers directory. After the mountlist is
created the partition will be automatically available each time A-Max IV is
run.
lf your device is not listed, make sure that the partition is not already mounted
and check to be sure that the device driver, number and flags are properly set.
Also, be sure that the memory type is properly set in the SCSl Preferences
window.
When you have finished adding partitions select Done to exit the Search SCSl
Device menu and return to the Device Preferences menu.
Add Existing File
Add Existing File on the Device Preferences menu displays a file requester
from which you can select an existing file that is not currently listed as an
available A-Max IV device.
ln order for the file to be used under Macintosh emulation, it must be properly
formatted. You could, for example, convert an existing file that has been used
as an lBM hard drive under Bridgeboard emulation, by adding the file and
formatting it from the Device Preferences menu.
-27-
AMAX IV ReadySoft, incorporated
Create New File
Create New File is used to set up a new file for use by A-Max IV . Enter the
size of the file you wish to create, in either kilobytes (Kb) or megabytes (Mb),
below the Create New File button on the menu.
Selecting Create New File opens up a standard Amiga requester for entering
the location of the file to be created. The default value of 800K, the standard
size of a Mac low-density disk, is handy for transferring information, with the
A-Max IV disk transfer utility, from the Macintosh to a low-density Mac disk.
You may also create a file that acts as the Mac's hard drive. Please note,
however, that using a file as the Mac's hard drive greatly decreases the speed
of A-Max IV.
When you have completed your Device Preference settings, select OK to
return to the A-Max IV Preferences menu.
SCSI
Selecting SCSI from the A-Max IV Preferences menu opens the SCSl Prefer-
ences menu. SCSl Preferences are used to access Mac SCSl peripherals such
as CD ROMs, scanners, or SCSl printers. SCSl hard drives should be added
to A-Max IV using the Device Preferences menu.
Important: Any SCSl device added via the SCSl Preferences menu must
have the proper software driver added to the Macintosh system folder before
the device may be accessed. lf, after adding a SCSl device to the controller,
the Amiga will not boot or incurs numerous hard drive errors, turn off the
machine and make sure that each device is properly connected and the last
device in the chain is terminated. For information on SCSl connections
consult your Amiga's User Manual or the manual that accompanied your SCSl
controller or device.
-28-
ReadySoft, incorporated AMAX IV
ID#
The ID# is used to select the SCSl address of the device you wish to access.
Place a check mark next to the proper lD number(s) by selecting the button to
its right. Each SCSl device that you wish to use MUST have its lD selected.
Device Driver
The Device Driver is the name of the SCSl device driver used by the Amiga.
For most Commodore SCSl controllers, the device driver is named
scsi.device. lf you are not using a Commodore controller, consult the control-
ler's manual for the name of the SCSl device it uses. Only device drivers
which comply with Commodore's SCSl Direct standard may be used.
Base Unit - The value entered in the Base Unit requester will be added to the
SCSl lD number to get the unit number of the device.
Some SCSl device drivers use a Unit number to reference extra SCSl control-
lers or SCSl LUN's (logical unit number) to reference extra controllers and
devices. Consult your SCSl controller's manual to determine the appropriate
number. ln most cases this value should be set at 0.
Mem Type
Mem Type is used to select the type of memory to be used when sending data
to the SCSl device. Three choices (Any, 24 Bit and Chip) are available.
Any - Any, the default value, is the fastest available option and will work
with most modern SCSl controllers and those built in to the Amiga.
24 Bit - This option may be required for older controllers when used in an
accelerated Amiga.
Chip - This is the safest option and may be needed by some older Amiga
SCSl controllers.
To exit SCSl Preferences and return to the A-Max IV Preferences menu,
select OK.
-29-
AMAX IV ReadySoft, Incorporated
General
Selecting General from the A-Max IV Preferences menu opens the General
Preferences menu. General Preferences are used to set how A-Max handles
low-density disks and how the Amiga mouse is used under emulation.
Format 720K Floppies
lf an unreadable low-density floppy is inserted in the drive, and the Format
720K Floppies button is selected, the disk will be optionally formatted in a
720K lBM format. This format is compatible with any newer Mac that has
the Apple SuperDrive. Note that it will be a Macintosh disk, with the HFS
filing system, and will not be readable from AmigaDOS.
If the Format 720K Floppies button is not selected, the disk will be formatted
in an 800K format that is compatible only with A-Max IV.
Right Button Mode
Right Button Mode allows the Amiga's right mouse button to perform either
of two functions when using A-Max IV .
Selecting the Same as Left Button Mode button allows you to use either mouse
button when using A-Max IV .
Selecting the Double Click button allows one click of the Amiga's right mouse
button to perform the function of a double click under A-Max emulation.
Select OK to exit General Preferences and return the main menu.
Serial/Parallel
Selecting the Serial/Parallel button from the A-Max IV Preferences menu
opens the Serial/Parallel Preferences menu. The Serial/Parallel Preferences
are used to establish how your Macintosh software will access serial devices,
such as a modem or MIDI device, or Parallel devices such as a printer.
-30-
ReadySoft, incorporated AMAX IV
POrt Mode
The standard Macintosh has two serial ports and no parallel port; one port is
known as the Modem Port or Port A, and the other as the Printer Port or Port
B. A-Max IV contains three options for handling each of these ports under
emulation.
The Port to be modified is determined by the port label currently displayed on
the upper left of the Serial/Parallel Preferences menu. You may switch
between Port A (Modem) and Port B (Printer) by selecting the Port button
with the Amiga's left mouse button.
Three options or Modes are available for each port. Plus Card uses the respec-
tive port on the A-Max hardware card, Device uses the appropriate Amiga
port, and File saves the port's output to a file on the Amiga.
Plus Card
Selecting the Plus Card directs all Macintosh output to a device connected to
the selected A-Max hardware port. This is, generally, the most compatible
option for Macintosh software.
Enable MIDl
Selecting the Enable MIDI button allows you to use the MIDI controller built-
in to Port A (Modem) of the A-Max hardware. You MUST use the optional
MIDI cable (available directly from ReadySoft) in order to use the MlDI
device. You must also move the switch on the rear of the hardware to MIDI
from its standard setting of Normal .
You may also use a Mac MIDI device connected to the A-Max modem port
via a standard Mac cable. If so, you should NOT enable the MIDI from the
Serial/Preferences menu, and the A-Max port should remain switched to
Normal.
-31-
AMAX IV ReadySoft, incorporated
Device
Selecting Device sends all information from the selected port to the Amiga's
serial or parallel port. If your Amiga has multiple ports, specify the name of
the driver used to access the port in the Device requester, and the Unit number
of the port you wish to use in the Unit requester. The standard Amiga serial
port uses the serial.device driver and is Unit 0. The standard Amiga parallel
port uses the parallel.device driver and is also Unit 0.
Selecting the Use AmigaDOS Preferences button allows the specified port's
settings to be controlled by the settings entered in the AmigaDOS Preferences
for the Printer and Serial devices. The settings on the Mac software you are
using will NOT override these Preference settings.
When printing to your Amiga printer, the best output will be obtained by
using a Macintosh driver specific for your printer. There are several third
party suppliers of printer drivers which allow the Mac to use printers other
than those from Apple. We have successfully tested the GDT Softworks
printer drivers which are available for dot matrix, daisy wheel and Hewlett
Packard InkJet and LaserJet printers. (Call (604) 291-9121 for more informa-
tion.)
File
Selecting File directs the specified Port's output to an Amiga formatted graph-
ic file on the Amiga's hard drive. The Set Directory button brings up a file
requester for specifying the name and location of the file.
Selecting the ImageWriter Emulation button prints using either the ImageW-
riter or LQImageWriter Macintosh printer drivers included with your Macin-
tosh System software. The driver is selected via the Macintosh Chooser. The
output file will be an Amiga IFF format graphic black & white image of the
printout at full resolution. Only the Mac print options of Best and Faster, set
from the Macintosh Print dialogue, are supported.
The IFF image may be loaded into an Amiga paint program, modified, and
then printed from the software to your Amiga printer.
After the Port A and Port B settings have been made, select OK to return to
the A-Max IV Preferences menu.
-32-
ReadySoft, incorporated AMAX IV
Networki ng
This window allows you to select a SANA-II (Standard Amiga Networking
Architecture II) compatible network driver to be used as an ethernet device
with A-Max. The default name is for the Commodore A2065 card; another
example would be
DEVS :networks/eb920 .device
for the ASDG LanRover card. Any Amiga ethernet card compatible with
SANA-II should work with A-Max. The card's manual should give the device
driver name.
The Unit and Flags fields will be zero for most devices, unless the card's
manual describes otherwise.
If the named device is present, then the Mac "Network" control panel will
give you the option of selecting EtherTalk, as well as the standard LocalTalk.
Selecting EtherTalk will allow file sharing and printer access over Ethernet,
and other protocols with the appropriate Mac software.
Save
Selecting the Save button on the A-Max IV Preferences menu saves the
current settings to your hard drive. The files are automatically saved to your
Amiga's DEVS: directory.
Start A-Max IV
Selecting the Start A-Max IV button on the A-Max IV Preferences menu
begins the Macintosh emulation using the current A-Max IV Preference
settings .
Quit
Selecting the Quit button exits the A-MaxStartup program.
-33-
Section 5
A-Max IV Operation
This section discusses the differences between using A-Max IV and a standard
Macintosh.
Keyboard Differences
The A-Max IV Software emulates the Apple Extended Keyboard. The
Extended keyboard has fifteen function keys, cursor control pad, numeric pad,
an Escape key, and six IBM equivalent keys: Page Up, Page Down, Home,
lnsert, Delete and End.
NOTE: Not all keys on the extended keyboard are supported by all applica-
tions, for example the "Esc" key is sometimes an equivalent to clicking a
"Cancel" button, but not always. This is the case for true Macintoshes as well.
There are several keys on the Extended keyboard that are not on the Amiga's;
the key equivalents are:
Command ( ) - right or left Amiga key
Option - right or left Alt key
For the IBM keys described below, in most cases the key equivalent is shift
plus the Amiga key with the same IBM function:
Home Shift-7 on the Numeric Pad
End Shift-1 on the Numeric Pad
Page Up Shift-9 on the Numeric Pad
Page Down Shift-3 on the Numeric Pad
Clear (Num Lock) Shift-( on the Numeric Pad
Fll Shift-Del
With the above exceptions, each Macintosh key is represented on the Amiga
keyboard. The Mac "Key Caps" desk accessory , included with the Mac
system software, allows you to verify the keyboard mapping.
-34-
ReadySoft, incorporated AMAX IV
Disk Eject
Macintosh disk drives differ from most others, including the Amiga, in that
they do not allow the user to eject disks upon demand. lnstead, the Mac
requires that you ask, through software, that a disk be ejected. The Mac
system doesn't necessarily update directories or files immediately but, rather,
waits until it needs the memory or a disk swap is requested.
A-Max IV , unlike previous versions of A-Max, does not indicate that an
Amiga drive is ready to be ejected by displaying its drive number in the menu
bar.
When using floppy disks with A-Max IV you MUST eject the disk using one
of the Mac Finder (Apple's Desktop software) methods listed below. After
requesting that the Mac eject the disk, wait a moment, until all drive activity
has ceased and the drive light is out, before removing the disk from the drive.
NEVER eject a disk manually under A-Max IV . Failing to abide by this rule
could result in corrupted or destroyed disks.
If you do eject a disk from an Amiga drive without the program's permission,
A-Max IV will detect this and, via a requester on the Amiga's WorkBench, ask
that you insert the disk before the Mac emulation continues. If this happens,
you should immediately replace the ejected disk in the drive. This will clear
the A-Max requester and close any open files on the disk.
There are several ways to request that a disk be ejected on the Mac:
When the Finder is running, you can eject a disk by selecting its icon and
using the File menu command Eject, or Amiga-E from the keyboard. The
disk's icon will not be removed from the screen and the Mac may later ask that
you reinsert it.
When opening a file from a Mac application, the dialog box will contain an
Eject button to eject the current disk.
Often the command-shift- 1 and command-shift-2 keyboard sequences will
eject the disks from either of two drives. Since a real Macintosh does not
allow more than two drives to be connected, this option is unavailable if you
are using A-Max IV with more than two disk drives.
-35-
AMAX IV ReadySoft, incorporated
Y ou may also eject a Mac disk by physically dragging its icon into the Mac
trashcan. While this action is normally reserved for deleting files from a disk,
dragging the disk's icon ejects the disk and removes the icon from the Mac
desktop.
The Mac Shutdown and Restart commands, located in the Finder's special
menu, ejects all disks before either rebooting or shutting down the Mac emula-
tion.
NEVER RESET YOUR AMIGA USING THE CONTROL-AMIGA-AMIGA
KEY SEQUENCE OR SHUT OFF THE AMIGA'S POWER WITHOUT
EJECTING ALL DISKS THROUGH THE MAC SY STEM !
Finder Shutdown
To exit A-Max emulation choose Shutdown from the Mac's Special menu.
This will close all open Mac applications, eject all disks in the Mac system,
and return you to the Amiga's WorkBench.
Emergency Shutdown
If you should find that a Mac application, or the Mac Finder, has stopped
responding to input, you may close it by simultaneously pressing the follow-
ing keys:
This should ONLY be done in the event there is no other method to exit the
application. Exiting by this means will lose all unsaved work and could result
in either floppy or hard drive errors.
Mouse Control
The Mac has a single button mouse, so the Amiga's right mouse button is
typically unused when running Mac software. You may, however, configure
A-Max IV to use either mouse button from the A-Max IV Preferences menu.
Since A-Max IV multi-tasks with Amiga programs, you will need to transfer
control of the Amiga mouse between normal AmigaDOS operation and A-
Max emulation.
When you first start A-Max IV the mouse is automatically placed in A-Max
mode and works exclusively with the Mac Desktop. To switch to AmigaDOS
control, hold down the left Amiga Key and press the right mouse button.
Repeat this procedure to switch back to A-Max mouse emulation.
-36-
ReadySoft, incorporated AMAX IV
Transferring Text from the Amiga to Mac
A-Max IV allows you to copy text directly between an Amiga application
which uses the Amiga clipboard and the Macintosh clipboard. Once the text
is copied to the Mac clipboard it may be transferred to any Mac application
via the program's paste function.
It is important to note that some older Amiga applications use their own
clipboard instead of the Amiga system's. These applications will not be able
to transfer text to the Mac clipboard.
In order to transfer text, be sure that the Macintosh Finder is the currently
selected application. Under System 7 the current application has a check mark
next to it in the Application Menu. The Application Menu is the menu at the
far right of the Mac Desktop. You can also bring the Finder "to the front"
simply by clicking on the Mac desktop or on any disk windows the Finder
has opened.
Using the right mouse button combination, return to the Amiga
Workbench. Select and copy the text you wish to transfer via the Amiga
program's editing functions. When you return to the Mac Finder, via the [left
Amiga] right mouse button combination, the text should be available in the
Mac's clipboard.
Text transferred from the Amiga to the Mac is translated from Amiga format
to Mac format using the same translation used by File Transfer IV (see
Section 8 for information on File Transfer IV.)
Transferring Text from the Mac to Amiga
Transferring text in the opposite direction works in a similar manner. Copy
the Mac text to the clipboard with a Copy command. Again, you must make
sure the Finder is the front-most active program on the Mac side. When you
switch to the Amiga Workbench the text contents of the Mac clipboard will be
available via the Amiga's clipboard device.
Formatting Disks
Floppy disks are formatted under A-Max IV exactly as they are on the Macin-
tosh; placing a blank disk in the drive while at the desktop will bring up a
dialog box prompting you to initialize the disk.
-37-
AMAX IV ReadySoft, incorporated
If you have an Amiga high-density drive, and insert a blank high-density disk,
the disk will format as a Macintosh 1 .4 MB disk that may be used with any
SuperDrive equipped Mac.
If you insert a low-density disk in either a high or low-density Amiga drive,
and you've selected the Format 720K Floppies option from the A-Max IV
Preference's General menu, the disk will be optionally formatted as a 720K
IBM format disk compatible with a Mac SuperDrive.
If you have not selected the Format 720K Floppies option, a low-density disk
will be formatted as an 800K disk that is compatible ONLY with A-Max IV .
A-Max IV does not read or write disks in the A-Max format used by previous
versions of the program. You should copy any data or programs you have on
these disks to a hard drive partition before upgrading your system to A-Max
IV.
Al1 A-Max hard drives, partitions, and file devices should be formatted from
the A-Max IV Device Preferences menu before they are used under Mac
emulation.
Sound
A-Max IV supports most digitized sounds. You don't have to do anything to
enable this feature, except set the sound level in the Mac Control Panel. The
sound option can be shut off by setting the volume to zero.
Many Mac applications, particularly games, go directly to the hardware to
produce sound. While some may produce undesirable results, others will
operate normally.
Real Time Clock
A-Max IV will automatically use the date and time from your Amiga system
clock. Use the AmigaDOS Date command to verify that your System clock is
accurate before starting A-Max IV .
Macintosh System Information
Selecting "About This Macintosh," available from the Apple menu, located at
the far left of the Mac's menu bar, displays information regarding your Macin-
tosh configuration. Total Memory represents the amount of memory , both
Chip and Fast, contained in your Amiga. Largest unused block represents the
amount of memory available to be allocated for new applications to run.
-38-
ReadySoft, incorporated AMAX IV
If "Use external Memory" is selected in the Memory Preferences window of
A-Max Startup, this number will include memory available from AmigaDOS.
System Software, which is always displayed in the About this Macintosh
window, shows the amount of memory used by the Mac system.
If you have Mac applications running they will also be shown in this window,
along with the amount of memory allocated to them.
Learning to Use the Macintosh
The manuals that accompanied your Macintosh system software are an excel-
lent source of information if you're new to the Macintosh. We recommend
that you spend some time with them in order to make the most of A-Max IV .
Another great source of information is the "Macintosh Bible," published by
PeachPit Press. The Macintosh Bible is one of the best references available
for Mac tips, tricks and shortcuts. Included is information on Mac operation,
as well as tips on Mac software. The book is also available with two compan-
ion disks of Mac public domain and shareware software. These disks include
some of the essential utilities, such as SuperClock, that no self-respecting
Macintosh owner should be without !
-39-
Section 6
Hard Drives and File Devices
If your Amiga has a hard disk controller installed, or is an Amiga with a built
in controller, such as the Amiga 3000 and 4000, A-Max IV can make use of
partitions on your hard drives to store the Mac system and applications. If the
controller has a SCSI port, A-Max IV can use it to access partitions on Mac
formatted SCSI drives, and to use other Mac SCSI peripherals such as
scanners, CD ROM drives, and printers.
Storing data on a Mac formatted external SCSI drive gives the advantage of
being able to access the drive from both A-Max IV and real Macintosh
systems. Storing data in a partition on an AmigaDOS hard drive lets you use
an existing hard drive with both A-Max IV and AmigaDOS.
Partitioning an AmigaDOS Hard Drive
Before A-Max IV will recognize your AmigaDOS hard drive, it will have to
be re-partitioned. To remain compatible with the large number of hard drive
partitioning schemes for Amiga hard drives, A-Max IV relies on the setup
software that comes with every hard drive to create its partitions. An A-Max
IV partition is simply an AmigaDOS partition with a PARTITION name that
begins with the four characters "AMAX," or the two characters "AX." Some
examples are:
AMAX0: AX0 :
AMAXWork : AMAX99:
Following the manufacturer's instructions, create a partition of the size you
want to dedicate to A-Max IV use. When you are partitioning your drive(s),
most hard disk setup utilities will ask you to name the partitions as you create
them. To denote a partition as an A-Max IV partition, the name you give it
must begin with "AMAX" (no spaces, no hyphen) or ,'AX" . Typically you
might want to name your A-Max partitions AMAX1, AMAX2, etc., but you
could also name them AMAXWork, AMAXBackup.
If your partitioning software doesn't allow you to name your partitions (it may
automatically name them DH2:, DH3: etc.), you may have to edit the mount-
list that the partitioning software creates (in the DEVS: directory). You will
have to find the default names that the partitioning software created and
replace them with names beginning with AMAX (as discussed above).
-40-
ReadySoft, Incorporated AMAX IV
Hard disk controllers that utilize the "Rigid Disk Format" or "Hardblocks,"
which includes most modern controllers, don't create a mountlist entry . The
only way to name your partition is with the manufacturer's setup software
itself.
Note that you CANNOT use the AmigaDOS Assign command to create a
logical device for A-Max IV use, for example
Assign AMAX1 : DH2 :
won't allow use A-Max IV to use DH2:, and will just be ignored. The actual
device name of the partition must contain one of the A-Max IV partition
designations, either AMAX or AX.
With A-Max IV you may also assign a partition to be used by A-Max by
setting its "DOSType" equal to the constant 0x54465300, with your partition-
ing software. If a partition has this DOSType it will be recognized by A-Max
IV regardless of its name. Also, the partition will be invisible to AmigaDOS
programs such as the Commodore Installer and the "info" C: command, and
will thus eliminate the "Not a DOS disk" errors that occur when these
programs attempt to access AMAX: partitions.
You may also manually add an existing AmigaDOS partition to A-Max IV's
list of devices with the Add DOS Partition in the Device Preferences window.
In this case, the partition's name or DOSType do not need to be altered.
Once all partitions you wish to dedicate to A-Max IV use have been appropri-
ately named, you must ensure that they are mounted before you run A-Max
IV . Most hard drive controllers will automatically mount all partitions, in
which case, you won't have to do anything. Some older controllers, such as
the Commodore 2090, will only mount the boot partition and leave it to you to
mount any other partitions. If this is the case, you should add the appropriate
mount commands to your startup-sequence, for example:
Mount AMAX1:
Mount AMAX2 :
-41-
AMAX IV ReadySoft, Incorporated
After you have established your partition(s), use the A-Max IV Device Prefer-
ences to mount and format them for use. Please consult Section 4, Starting
and Configuring A-Max IV , for information on performing these tasks.
Making A-Max IV Partitions Bootable
You will normally want to make one of your partitions bootable so A-Max IV
will automatically start the Mac system without the need for a floppy disk.
Once set up, any one of the partitions can be made bootable by installing the
Mac System files in the partition, and by setting the partition as a boot parti-
tion in the A-Max IV Device Preferences menu.
If more than one partition contains a System folder, A-Max IV will boot from
the first valid system it finds. You should use the Boot options in the Device
Preferences menu to enable only the hard disk partition you wish to boot from.
Apple recommends that a single partition or disk NEVER have more than one
System folder installed on it.
A-Max IV Partitions Under AmigaDOS
Since AMAX: partitions are really just AmigaDOS partitions that contain non-
DOS information, they are still present and accessible while running the
normal AmigaDOS environment. Usually , a "Not a DOS disk" error will be
returned if you attempt to access A-Max IV partitions with AmigaDOS
commands.
You can eliminate these errors by setting the DOSType of the partitions you
wish to assign to A-Max's use, as described above.
WARNING
It is possible to issue an AmigaDOS Format command that will reinitialize
your A-Max IV partition and make it usable by the Amiga filing system.
Doing this will completely erase your A-Max IV partition and any programs
or data you had stored there.
-42-
ReadySoft, Incorporated AMAX IV
Using Mac SCSI Devices without
A-Max IV Partitions
Y ou may wish to use a Mac SCSI device instead of devoting an Amiga parti-
tion to A-Max use. Information on setting up a SCSI device for A-Max use is
contained in Section 4, Starting and Configuring A-Max IV .
Section 4 also contains information on using other Macintosh SCSI devices,
such as scanners, CD ROMS, and printers with A-Max. These devices,
however, generally require that you install their driver in the Macintosh
System folder. Consult the user manual of each device for information on
installing its software.
Startup Sequence
When A-Max IV starts, it first checks for and installs all disk devices. These
include:
. Up to four floppy drives;
. All the A-Max IV hard disk partitions, file devices and Mac formatted SCSI
partitions in the order listed in the Device Preferences menu;
. Mac formatted SCSI devices, if they have been added in the A-Max IV SCSI
Preferences menu. Devices are mounted in order of descending SCSI device
address number. The drivers for Mac SCSl devices are loaded from the
Macintosh system.
When all devices and partitions have been installed, the Mac system scans
through the devices looking for a startup disk, one which contains a valid
System Folder. A bootable Mac floppy disk will become the startup disk if it
is in the disk drive as A-Max IV begins its emulation.
It is important to note that A-Max IV does not support the Mac system's
"Startup Disk" control panel. All startup disk options are set via the A-Max
IV Device Preferences menu.
-43-
Section 7
Software Compatibility
System Disks
A-Max IV requires that you use Apple System 7.0 or greater. System version
7.1 is recommended. While most Mac applications are compatible with
System 7, you may find that some older applications will not work properly
unless they are updated to System 7 compatible versions.
Apple now ships its System disks in a high-density format. If your Amiga
contains a low-density drive you'll need to special order the System 7 . 1 disks
in a low-density format. This format may be special ordered directly from
Apple or one of their authorized dealers. Using the A-Max Disk Transfer
utility you can transfer each System disk into a file device that will be mount-
ed on the Mac desktop when you start A-Max. The System disk labeled
"Installer" is a bootable Mac disk and, as a result, your Mac will startup from
the file containing this disk's contents.
Once you've booted your A-Max IV Mac emulator from the Installer disk you
may install the Mac System 7 files onto your A-Max partition.
Compatibility with Macintosh Applications
Since A-Max IV is an emulator, and not a Macintosh, there will be some Mac
software that will not run under A-Max IV . Almost all Mac software that
goes through the Macintosh operating system, which includes most productiv-
ity applications, will run under A-Max emulation. Because of the wide range
of hardware in the Macintosh family, it is rare for modern Mac software to
bypass the Macintosh operating system.
Compatibility problems arise when software talks directly to the hardware,
bypassing the operating system. This is most evident in copy-protected
software, games and programs designed to use Mac hardware add-ons. Unfor-
tunately there is little that can be done to allow these types of programs to run
with A-Max IV.
The A-Max IV hardware enhances compatibility with software because it
provides two chips identical to those found in a Macintosh - the 8530 Serial
Communications Controller (SCC) and the 6522 Versatile Interface Adapter
(VIA). Programs running under A-Max IV can directly access either of these
chips and achieve the correct results. Examples of such programs include
terminal programs, MIDI applications, and programs that make use of the
VIA's accurate timers.
-44-
ReadySoft, incorporated AMAX IV
What to Do if an Application Won't Run
Some older Macintosh applications will refuse to run unless your A-Max IV
system is configured exactly like a standard Mac. If you encounter such a
program, upgrade your Mac software to the latest release version from the
manufacturer, a version which is System 7 compatible. If the program goes
directly to the hardware to produce sound, set the sound volume level to zero
in the "Sound" control panel. This can stop some applications from attempt-
ing to produce sound in an A-Max IV unfriendly manner.
On Amigas equipped with the 68040 CPU, such as the A4000/040, some older
applications will run only with the CopyBack cache mode of this procesSor
disabled. Use the standard Amiga CPU command to disable the copyback
cache mode. Again, upgrading your Mac software will usually resolve any
probIems with the 68040.
If you have problems booting from an existing Mac hard drive partition, try
disabling the Extensions ( or "INITs") present on the hard drive by hoIding
down the shift key as A-Max IV starts up - the Welcome to Macintosh
window will display "Extensions disabled. ,, Increasing the "INIT partition"
sie in Memory preferences may be necessary in order to solve this booting
problem.
-45-
Section 8
Moving Files Betw een the Amiga
and Macintosh
The A-Max IV installation software installs a Mac utility to transfer files, or
complete directories, back and forth between AmigaDOS disks and any Mac
format A-Max disk device. This program, File Transfer IV, is installed as a
file device by the A-Max IV installation software and is contained in the
"Utils" directory on the Mac desktop when you start A-Max IV .
File Transfer IV also provides functions to convert different types of files
during the transfer. With the MacBinary file transfer, for example, you may
download Mac applications under AmigaDOS from information services and
then later transfer the application from MacBinary format into a usable form
on the Mac side.
Start A-Max IV and boot the Mac system as usual. Double click the Utils disk
icon to open the disk, and then double click the File Transfer IV program icon
to run it. The program opens with a window displaying both copyright infor-
mation and the Version number. Click on this window to access the File
Transfer IV menu.
The File Transfer IV menu is divided into six areas. The upper left of
the menu contains information on the Transfer Status and, just below
it, information on the last error encountered, if any .
-46-
ReadySoft, Incorporated AMAX IV
On the right of the menu, the Translation Options section allows you to
select between five options for conversion of the file. Below the Translation
Options are the buttons used to specify whether the data or resource fork infor-
mation for the file is transferred and, just below these buttons, are gadgets for
entering the Creator and Type for the file. Transfer of files and directories is
controlled by the buttons on the bottom of the menu under the labels Transfer
a FILE and Transfer a DIRECTORY's contents.
File Conversion Options
The conversion options available with File Transfer IV are:
None - Copies the file without any translation. This is useful to copy files
that you will translate with other software, such as ASDG's Art Department
Professional for the Amiga, or Adobe PhotoShop on the Mac side.
Text - Converts plain text files between the two systems. Amiga line feeds
and Mac carriage returns are translated and vice versa. Accented and non-
standard characters are translated to the equivalent character, or the closest
available character.
MacPaint - Converts single bitplane images (2 colors) between Macpaint or
IFF, depending on whether the file is being transferred from or to AmigaDOS.
Files transferred to AmigaDOS are converted from MacPaint to IFF , transfer-
ring from AmigaDOS converts the IFF to MacPaint format.
MacBinary - MacBinary is the most common format for Macintosh applica-
tions and files stored on BulIetin Board Systems. Macintosh files downloaded
from a BBS can be transferred using the MacBinary setting.
PostScript - Use this option when transferring PostScript files.
Advanced Options
There are additional gadgets for selecting Mac-specific attributes of the Mac
source or destination file. When a file conversion option is selected, defaults
are set for these options that will be correct for most uses of File Transfer IV .
-47-
AMAX IV ReadySoft, Incorporated
Fork Selection
Macintosh files are composed of two logical segments called forks. Every file
can have both a "resource" and a "data" fork. Most applications, and many
data file formats, store all their information in the resource fork and access it
with the Mac Operating System's Resource Manager. Some files may have
text or other data stored in the data fork.
The Fork Selection gadget allows you to reference the contents of either fork
of a Macintosh file. The MacBinary conversion mode always transfers both
forks of a file.
File Type and File Creator
Every Macintosh file has a File Type and a File Creator field. This informa-
tion provides the same basic function as AmigaDOS's .info files. Each of
these items is a four character string. The file type specifies what kind of
information the file contains: TEXT, APPL, PlCT , PNTG, etc. The file
creator is a unique identifier of the application that created the file: WRIT,
FPNT , etc.
To enter a File Type or File Creator, click in the appropriate string gadget and
type the identifier. Again, if you don't know what abbreviations to use, or do
not care to specify any, the default values will most often be correct.
Transferring Files and Directories
From AmigaDOS
Selecting the "from AmigaDOS" button under the "Transfer a FILE" or
"Transfer a DIRECTORY's contents" headings transfers you back to the
Amiga's WorkBench where a standard Amiga file requester is opened.
Select the file or directory you wish to transfer by scrolling through the list of
available directories or filenames. The current path is displayed below the
directory list. When you have made your choice select "OK" to begin the
transfer.
A standard Mac file requester will appear. Select the drive and, optionally,
any subdirectories to which you want the destination file copied. If you
choose, you may also give the destination file a new name. The file will
inherit the source file's name if you don't change it. Click on Save to complete
the transfer.
-48-
ReadySoft, incorporated AMAX IV
To AmigaDOS
Transferring files or complete directories from the Mac to AmigaDOS revers-
es the above process. Selecting "to AmigaDOS" opens a standard Mac file
requester. Select the file or directory that you wish to copy and select "Open"
to begin the transfer.
After selecting Open from the Mac requester you will be taken to the Amiga
Workbench where a standard Amiga file requester has been opened. Specify
the destination for the file or directory and select OK to complete the transfer.
The file or directory is transferred to the AmigaDOS disk with the same file or
directory name. If a file by that name already exists it will be overwritten
during the transfer
-49-
Section 9
Printers
A-Max IV will print to any standard Macintosh printer connected to A-Max
IV's serial port, or an Amiga printer connected to the Amiga's parallel port for
which a Macintosh printer driver has been installed.
Drivers For Other Printers
There are several third party suppliers of printer drivers to allow the Mac to
use other types of printers. We have successfully tested the GDT Softworks
printer drivers which are available for dot matrix, daisy wheel and HP LaserJet
printers. The GDT PowerPrint package (which supports Epson compatible dot
matrix, HP LaserJet series and BubbleJet series compatible printers) is availa-
ble from ReadySoft. For more information, call (604) 291-9121
ImageWriter Emulation
You can use A-Max's built-in ImageWriter emulation to print a document to
an IFF file, which can then be modified and printed using any Amiga paint
program. Information on setting up the ImageWriter emulation is contained in
Section 4, in the discussion of A-Max Serial/Parallel Preferences.
You must install the Apple ImageWriter driver in the Mac system folder, and
select it in the Macintosh Chooser, in order to access this emulation.
Creating A PostScript File
In order to create a PostScript file your Macintosh system folder must contain
the LaserWriter file (LaserPrep is no longer required), and the LaserWriter
should be selected with the Chooser desk accessory. When selecting the
LaserWriter, you can safely ignore any "Can't Open AppleTalk" messages.
The System 7 LaserWriter driver has a Destination option to print to disk.
Simply set this option to "PostScript File" before clicking the "Save" button
and select a destination file name in the standard file requestor.
Some Mac applications, such as Aldus PageMaker, utilize their own printer
drivers, most of which have options to create a PostScript file. A PostScript
file created by A-Max and the LaserWriter driver may be taken to any Service
Bureau for printing, or printed directly via a PostScript printer connected to
the A-Max serial port, or the Amiga.
-50-
Section 1 0
A-Max IV Hardware Features
LocalTalk (AppleTalk)
"AppleTalk" now describes all of Apple's networking system, and "LocalTalk"
describes the low level physical hardware of Apple's low cost network
hardware, which was previously known as AppleTalk. AppleTalk Phase 2 can
also utilize Ethernet (via EtherTalk) and Token Ring (via TokenTalk)
hardware. Currently, A-Max IV supports only LocalTalk networks.
A-Max IV will allow SANA-II (Standard Amiga Networking Architecture II)
compatible Amiga ethernet cards to be used as Apple EtherTalk devices,
selectable with the Network control panel. See the Networking section of A-
Max Preferences.
A-Max IV provides you with two serial ports that offer the same features as
those of a Mac, including compatibility with the LocalTalk interface boxes
made by Apple and other manufacturers, and other interfaces such as Farallon
Computing's PhoneNet.
Using LocalTalk with A-Max IV is identical to using it on a real Mac, there
are no A-Max IV Preferences controlling this option. Connect the interface
hardware to the A-Max hardware's Printer Port, and use the Chooser desk
accessory to turn AppleTalk on. You should then be able to access AppleTalk
printers and file servers as you would on a Mac.
MIDI (Musical Instrument Digital Interface) Support
The A-Max IV hardware card lets you run many of the popular Macintosh
MIDI sequencers and tools. The card provides the same serial port as a Mac
and allows these programs to directly access the hardware and still retain A-
Max compatibility.
When running MIDI software you can make use of the card's on-board MIDl
box by connecting the optional MIDI Y-cable, flicking the switch on the rear
of the card to "MlDI," setting the A-Max IV Serial/Parallel Preferences
options to use Port A (Modem) and selecting the Enable Midi settings.
-51-
AMAX IV ReadySoft, incorporated
Alternatively, you may choose to connect the same MIDI box that you would
normally use on a Macintosh to one of the A-Max card's serial ports if, for
example, you need more than one MlDI Out port. In this case set the card's
switch to the "STD" position and the Port A or B options, depending on the
port you connect the MIDI device to, to use the A-Max hardware.
Once you have set up your system, MIDI appIications should run as they
wouId on a standard Mac.
NOTE:
The A-Max IV card's MIDI interface provides software with a 1 MHz crystal
oscillator for precise adherence to MIDI specifications.
-52-
Glossary
AGA (Advanced Graphics Architecture) Chipset: The graphics chipset
found in the Amiga 4000 and 1 200 which is capable of displaying up to 256
coIors on a standard Amiga WorkBench or 256 colors on the Mac under A-
Max IV emulation.
Agnes: An Amiga custom chip that determines the amount of Chip memory
your Amiga can use. The Amiga 2000 may address 1 megabyte of Chip
memory. The Amiga 3000 and 4000 are capable of addressing 2 megabytes
of chip memory.
AppleTalk: Apple's local area networking System Software.
AppIication Menu: The menu at the far right of the Mac's menu bar in
System 7 that allows you to switch between active programs and hides
windows from view .
BalIoon Help: A feature of System 7 which provides help, in the form of
smalI text balloons, that appears when you point at items on the Macintosh
screen. Balloon Help is turned on and off from the Help menu, the second
menu from the right on the Mac's menu bar.
Chooser.. A Macintosh desk accessory that alIows the user to select which
printer driver on the System disk will be used for printer output, as weIl as
other options such as the printer output port and AppleTalk activity.
ControI PaneI: A Macintosh desk accessory that lets the user control several
different options, such as sound voIume, mouse and keyboard. Equivalent to
the Amiga's Preferences program.
Data Fork: One Iogical segment of a file in the Macintosh filing system that
contains simpIe streamed data (e.g.: the raw text characters in a word process-
ing document). See also Resource Fork.
File Creator.. A four character unique identifier contained within a file in the
Macintosh filing system that identifies the program on which the file was
prepared.
File Type: A four character designator contained within a file in the Macin-
tosh filing system that identifies what kind of file it is and helps the Finder
decide how to use it.
-53-
AMAX IV ReadySoft, incorporated
Finder:. The program that creates the Apple desktop. Equivalent to the
Amiga's Workbench. The Finder program has many versions and shouId
always be run in conjunction with the correct version of the System file.
Finder Shortcuts: A series of five helpful information cards which detail the
keyboard shortcuts available as you work with icons and windows on the Mac
desktop. Finder Shortcuts are displayed from the Mac Help Menu (See
Balloon HeIp).
FoIder.. The equivalent to an Amiga directory. The folder is used on the Mac
to group together files in a directory .
Fork: In the Macintosh filing system, one of two logicaI segments that consti-
tute a file. See Resource Fork and Data Fork.
Resource Fork: One logicaI segment of a file in the Macintosh filing system
that contains many elements and types of information, access to which is
controlled by the Resource Manager. See also Data Fork.
System FoIder: A Macintosh directory which contains information the Macin-
tosh requires for operation. This incIudes startup information, fonts, Apple
Menu items, and other system code.
System Disk or Startup Disk: A disk that has the required system informa-
tion on it for the Mac to startup (boot). This always incIudes the System fiIe
and usually incIudes the Finder file (it is possible to have a System disk that
consists of a System fiIe and an appIication that is started automaticaIly).
Often there wilI be other fiIes that are not absoIuteIy necessary for startup. All
the various system fiIes are heId together in a System folder on the System
disk.
- Glossary -2-
Index
1.4 MB disk 38 Deltas 14 ImageWriter
128K ROMs 6 Device driver 26 Emulation 32, 50
24-bit Video 1 7 Device number 26 INIT Partition Size 22
68040 CPU 45 Device Flags 26 Installation 8
720K Floppies 38 Device Preferences menu 24 Installer disk 44
800K format 30 Devs:A-MaxVCtrls 1 6 InstaIler 1 1
A-Max II Plus, Upgrading 9 DEVS:A-MaxFileDevices 1 4 Intuition screens 18
A-Max IV Disk Transfer 1 2 DEVS:DOSDrivers Key equivalents 34
A-Max IV Software, directory 27 Keyboard Differences 34
Installing 1 0 Digitized sounds 38 Large screen monitors 1
A-Max IV system 3 Directories, Transferring 48 LaserPrep 50
A-Max IV Operation 34 Disk Eject 35 LaserWriter 50
A-Max IV Preferences 15 Disk Name 14 Learning to Use the
A-MaxStartup 15 DOSType 41 Macintosh 39
A-MaxInit 1 1 Double Click 30 LocalTalk 3, 51
A-Max IV copyright box. 15 Eject 35 Logical unit number 29
A-Max Partitions 24 Electrical Hazard 7 Logical devices 41
A-Max IV 1 Emergency Shutdown 36 Low-density disks 12, 38
A2065 card 33 Enable MIDI 31 LQImageWriter 32
A4000/040 45 Error Mode 1 3 Mac formatted SCSI
About This Macintosh 39 Ethernet 33 , 5 1 devices 43
Add Existing File 27 EtherTalk 33 Mac format disks,
Add Partition 25 EtherTalk 51 reading and writing 3
AddScreen gadget 1 8 Extended keyboard 34 Mac SCSI devices 43
Aldus PageMaker 50 Extensions, Disabling 45 Mac Plus ROMs 1
Amiga Disk Drives 1 2 Extreme Size 18 Mac SCSI peripherals 28
Amiga clipboard 37 File Devices 24 Mac SCSI Partition 24
Amiga Screen Modes, File Type 48 Mac files, transferring to 12
Configuring 1 8 File Conversion Options 47 low-density disks
Amiga ethernet card 33 File Transfer IV 46 MacBinary 47
Amiga video 1 7 File Creator 48 MacBinary file transfer 46
Amiga Built-in Video 1 7 Filing devices 24 Macintosh INITS 22
AmigaDOS partitions 26 Finder Shutdown 36 Macintosh clipboard 37
Apple part numbers 6 Floating point math Macintosh Output,
Apple SuperDrive 12 coprocessors 1 through Amiga 32
AppleTalk Phase 2 51 Floppy drives 9 Macintosh output,
ASDG LanRover 33 Fork Selection 48 directing to device 31
AutoScroll flag 18 Forks 48 Macintosh Bible 39
Backing up your Disks 6 Format 720K Floppies 30 Macintosh driver 32
Base Unit 29 Format 25 MacPaint 47
Best Fit 22 Formatting Disks 37 Maximum Size 18
Boot options 42 Full Disk 13 Mem Type, Chip 29
Boot 25 GDT PowerPrint package 50 Mem Type 29
Bridgeboard Hard Files, GDT Softworks 32 Mem Type, 24 Bit 29
Using 27 General Preferences menu 30 Mem Type, Any 29
CD ROMs 28 Graphic file, Amiga format 32 Memory Preferences
CD ROM drives 40 Graphics Size 18 menu 21
CLI, Starting A-Max from 1 5 Grounding 6 Memory Preferences 39
Clipboard 37 Hard disk controllers 41 Memory, Total 39
Clock 38 Hard Drives and Memory allocation,
Color Depth 21 File Devices 40 Video 18
Color modes 1 Hardware Features 5 1 Memory management
Compatibility problems 44 Hewlett Packard InkJet 32 units 1
Configuring A-Max IV 15 HFS filing system 30 MIDI control switch 9
Controllers, Video 1 6 High-density disks 12 MIDI 3, 51
CopyBack cache mode 45 HP LaserJet printers 50 Modem Port 31
Create Mountlist Entries 27 IBM PC format Mount 25
Create New File 28 720K disks 1 2 Mountlist entry 41
Creator 47 IC5 10 Mouse Control 36
Data fork 48 ID# , SCSI 29 Mouse emulation 36
Date command 38 IFF 47
Index-1
A-MAX IV ReadySoft, Incorporated
Multitasking Preferences Software Compatibility 44
menu 22 Sound 38
Multitasking 1 Startup Sequence 43
Networking 33 Startup disk options 43
New chip, Installing 10 Startup Disk 25
Not a DOS disk 42 Static Discharge 6
Number of colors 21 SuperClock 39
Overscan Prefs 18 SuperDriv e 38
Parallel port 31 System Partition Size 21 -22
Partition 40 System 7.1 44
Partitioning an System resources, 22
AmigaDOS Hard Drive 40 sharing 42
Partitions 40 System folder 38
Partitions, 42 System clock 44
Making bootable 37 System 7 23
Paste Task Priority 18
PhoneNet 51 Text Size 51
Picasso 4 Token Ring 51
Port B 31 TokenTalk 14
Port A 31 Transfer Disk to File 14
PostScript files 47 Transfer File to Disk 37
Printer drivers 50 Transferring Text 14
Printer Port 31 Transferring Files
Printers 50 Use AmigaDOS 32
Printing 32 Preferences
Public domain software 39 Use External Memory 22, 39
ReadMe. 4 Using floppy disks 35
Real Time Clock 38 Verify Writes 13
Registration card 3 Versatile Interface 45
Remove File Device 25 Adapter 16
Resource fork 48 V ideo Preferences
Restart 36 Virtual monitors, 20
Retina 4 Configuration 19
Ribbon cable 9 Virtual monitors 20
Right Button Mode 30 Virtual desktop 23
Rigid Disk Format 41 Wait in Foreground 23
ROM chips 3 W ait in Background 5
Same aS Left Button W arranty assistance 3
Mode 30 What's Included
SANA-II 33 , 5 1 Width and Height settings 18
Scanners 28 W orkbench, Starting 15
ScreenModes 17 A-Max from 8
SCSI printers 28 Zorro slot
SCSI LUN 29
SCSI Preferences 28
SCSI ID 26
SCSI peripherals 40
SCSI controller 26
SCSI device driver 26,
29
Search SCSI Device 26
Selected Device 24
SerialParallel 30
Preferences menu
Serial Communications 45
Controller 3, 31
Serial ports 14, 32
Set Directory 11
SETPATCH 39
Shareware software 36
Shutdown 6
Software piracy
Index-2
A-MAX IV Readysoft, Inc.
------------------------------------------------------------------------------
- End of Text -
- ADDENDUM -
A-Max IV User's Guide
Addendum for Version 4.00
12 December 1993
Apple System Versions:
Version 4.0 has been tested with Apple System versions up to and
including version 7.1.1 (Pro).
Mouse and Keyboard Control:
Although it is mentioned in the manual, it is worth repeating
here - the sequence left Amiga key - right Mouse button
switches the mouse and keyboard between Mac and Amiga modes, and also
makes the correct screen visible.
New Keyboard Mapping:
There was one key on the Apple extended keyboard that was
previously not emulated - the "=" key on the numeric keypad. The sequence
shift - 5 (on the numeric keypad) is now equivalent to typing this key.
Video Refresh Modes:
There are gadgets on the Video Preferences window that are not
explained in the User's Guide, controlling how A-Max IV refreshes color
screens. These refresh modes will only be rarely useful and the default
"Accurate" mode should be used normally.
The "Optimised" mode can speed drawing operations but will have
some effect on visual results while the drawing is taking place, so this
mode is not recommended for animations. The "Timeout" parameter controls
this mode - larger values will increase the effect.
The "Paranoid" mode is useful for programs, usually games, that
may directly access screen memory, bypassing the Mac operating system.
If a program seems to produce no visuals, with just a blank screen, this
mode may allow you to run the program. "Paranoid" mode is definitely not
recommended for everyday use, as it will slow down the emulation. The
"Timeout" parameter controls how quickly the screen is refreshed -
smaller values speed the screen changes at the expense of overall
performance.
There is no harm in trying these modes, so if you think they may
be necessary, try enabling them.
Cache Settings:
If you have a 68040 equipped Amiga you may sometimes find it
necessary to disable the copyback cache mode of this processor to
run some older Mac titles, or System 7.0. Use the Commodore CPU command
to control the cache settings of your processor, or any utility that came
with an accelerator board. A-Max IV will use the same cache settings as
the Amiga system.
Text Cut & Paste:
As mentioned in the guide, you should make sure the Mac Finder
is the frontmost process on the Mac side before cutting or pasting.
- End of Text -
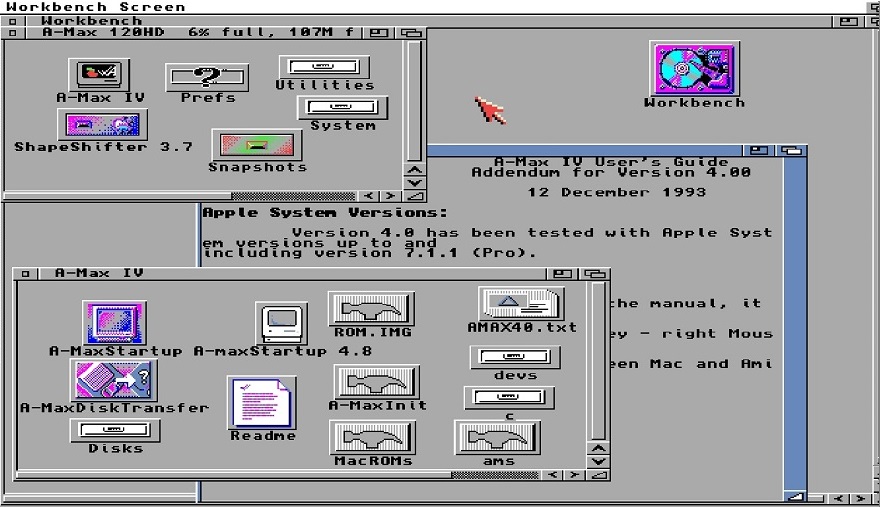
I custom made my A-Max IV Mac drawer Icon... 4.8 is probably 4.008
This is the Amax IV (v4.0x)
A-Max IV text was OCR converted on an Amiga by: _ ?Ken Harvey? _
HTML conversion by Reginal Cross.
Scanned A-Max images courtesy of Ken Harvey (Not yet present)
& Modified and edited to a limited degree by Reginal Cross.
Last Updated 28 Oct 2019
If you find ANYTHING significant wrong or misspelled, please contact [Me].